Typesetting with Illustrator and AI2ASS - Part II: Gradients
Recently, I’ve been repeatedly approached with the question on how to do gradients using Adobe Illustrator and convert them to ASS. Part of the reason for the frequent inquiries might be that I’ve been promising it since finishing the first part of the tutorial and not delivering on it for rougly four and half years.
Seeing as how typesetting hasn’t really taken any signifiant leap forward since then and the tools still work, I decided to pick up the Typesetting with Illustrator and AI2ASS series again and start with giving you a quick rundown on how to create linear and radial gradients in AI and getting them to show up correctly on the Aegisub end.
Prerequisites
Software
- Aegisub
- Adobe Illustrator CC 2018+ (v22.0.1)
- DependencyControl v0.6.4+ (for installing Aegisub scripts)
Illustrator Scripts:
Aegisub Scripts:
- Paste AI Lines v0.2.0+ (install via DependencyControl)
- Nudge v0.5.0+ (install via DependencyControl)
Knowledge
This tutorial is aimed at typesetters, so you are expected to have firm grasp on typesetting with Aegisub in general and are familiar with both AI and the AI-to-Aegisub workflow.
Why would I need AI for gradients?
In general you don’t. While ASS itself does not support gradients, automation scripts the excellent Gradient Everything and Gradient along clip edge. These scripts work by creating a many small rectangular or vectorial \clip (varying by script and gradient shape), each covering a small strip of your gradient surface area. Each of them is applied to a copy of your input text or drawing, which is then assigned a \color sampled from your desired gradient.
The reasons for doing it this way are practical in nature:
- The method works on any text or drawing.
- The method does not require any processing of the actual content (text shaping, path clipping etc), making it easy to implement.
\clips are not affected by any other override tag or style parameter, so the bands are guaranteed to be in-place no matter what else is going on in the line.\blurcan be applied without making the background shimmer through. Semi-transparent typesetting does not show any artifacts (true for Gradient Everything, not so much Gradient along clip edge).
However, there are also a number of limitations that arise from this method:
- Due to
\clips creating hard, undithered edges, you will need comparatively many strips to minimize banding artifacts/posterization of your gradient. Do that on a large shape, fbf it over a few seconds and you got yourself a performance issue. - All generated gradient strips will end up with an even size, so some of those may end up having the same color - making the method wasteful in areas where there’s little variation in your gradient. To my knowledge, none of the available scripts optimize for this.
- It is not easy to animate the generated gradient due to
\clips not being affected by\moveor\transform. You could still do so using specialized scripts, but few options are readily available. - You may not find it all that easy to incorporate an existing or additional
\clipyou need for the sign. I - The lack of a WYSIWYG UI locks you into a trial and error approach for getting complex gradients right.
No radial gradientsPossible but limited to 2 colors with Gradient along clip edge (Thanks @Myaamori abnd @Adriks for pointing this out).
In principle, the same method could be used to export gradients from AI to ASS, yielding most of the same advantages and limitations - with the notable exception of having a much nicer UI to fine-tune stuff with. I may at some point provide scripts that do exactly that, but they’d be ultimately boring and require no further introduction.
Instead, were going with a different approach that results in pre-clipped drawings and comes with its own pros and cons, making it worthy of its own place in our typesetter’s toolbox.
Linear Gradients
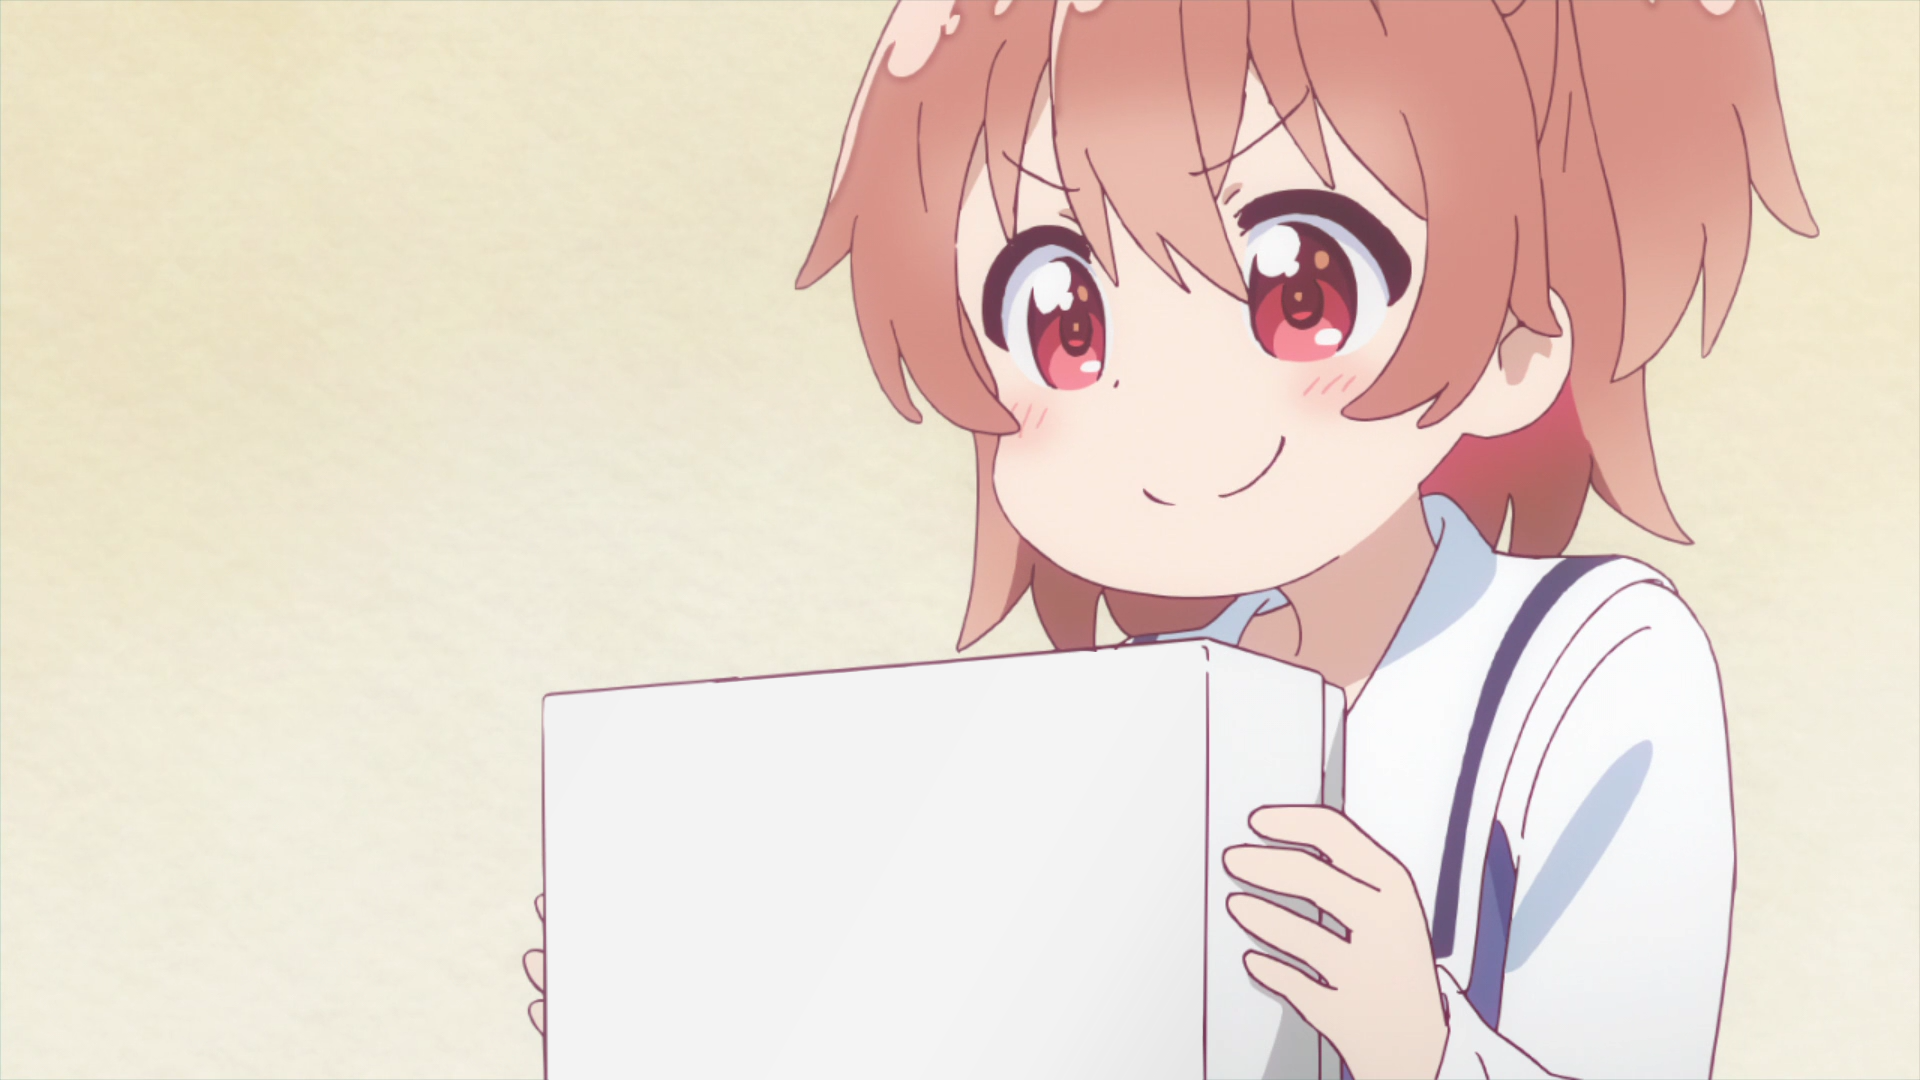
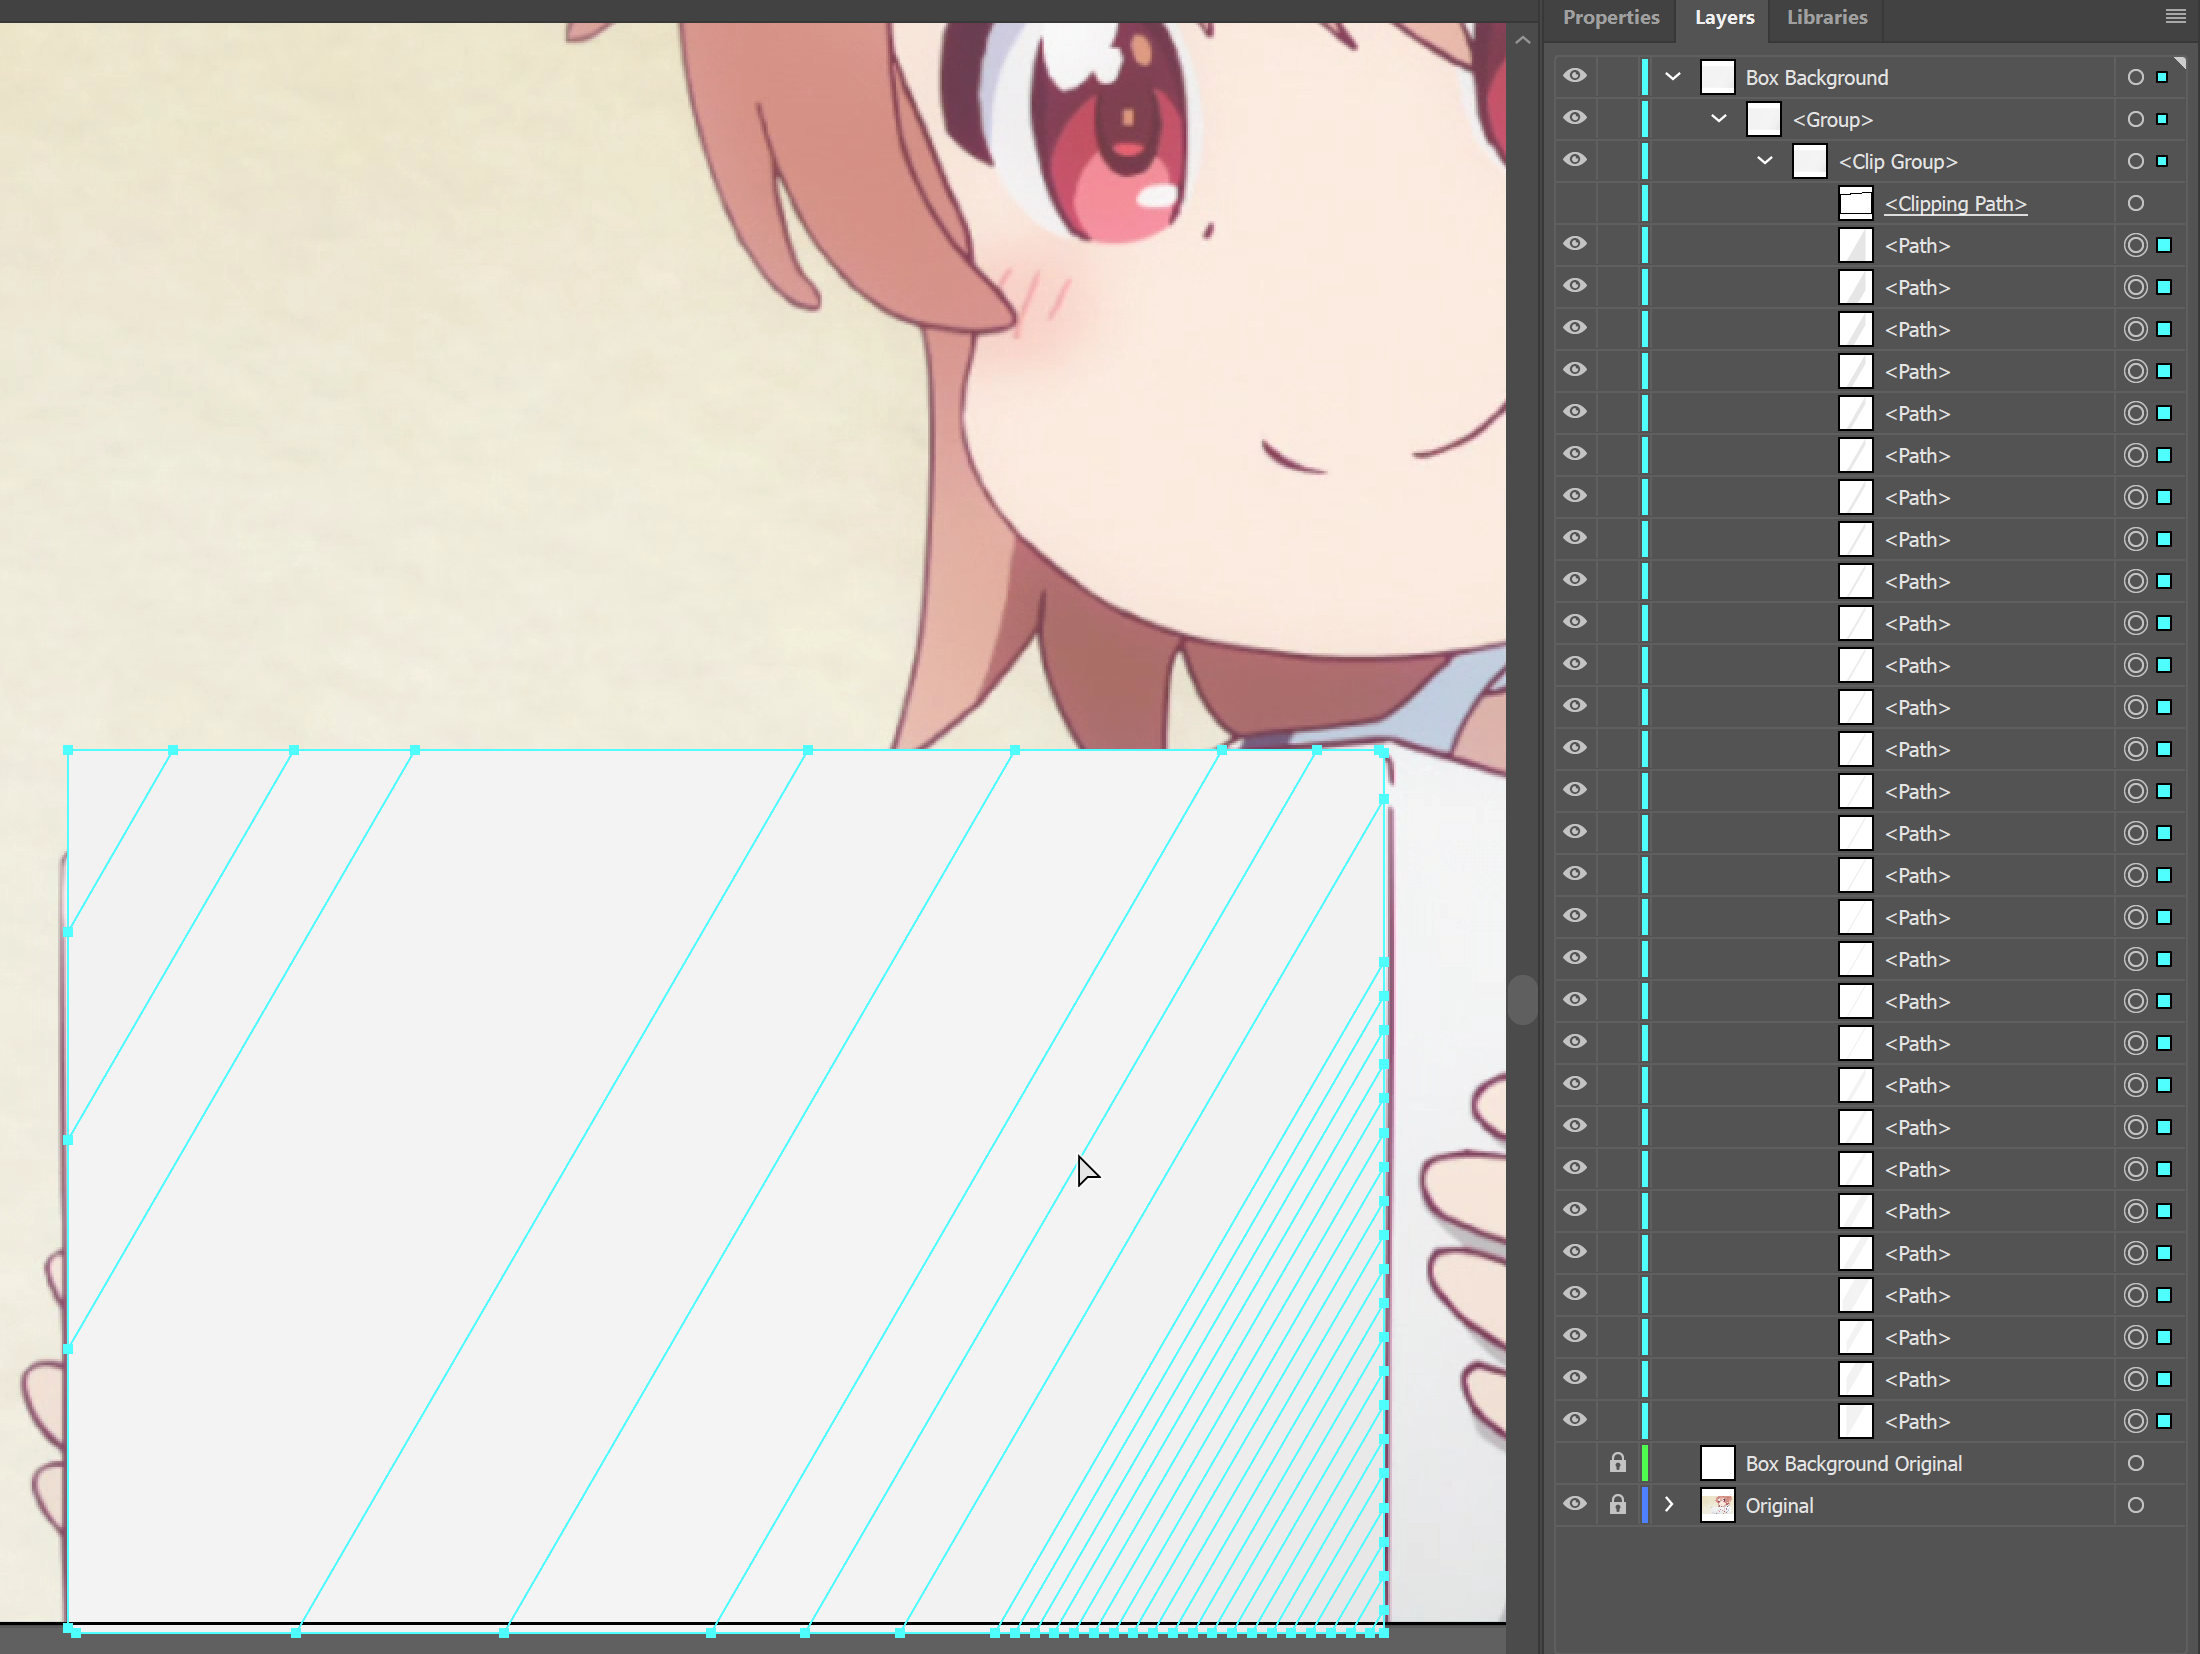
A few days ago, @Dave gave us this to work with on the TypesettingTools Discord.
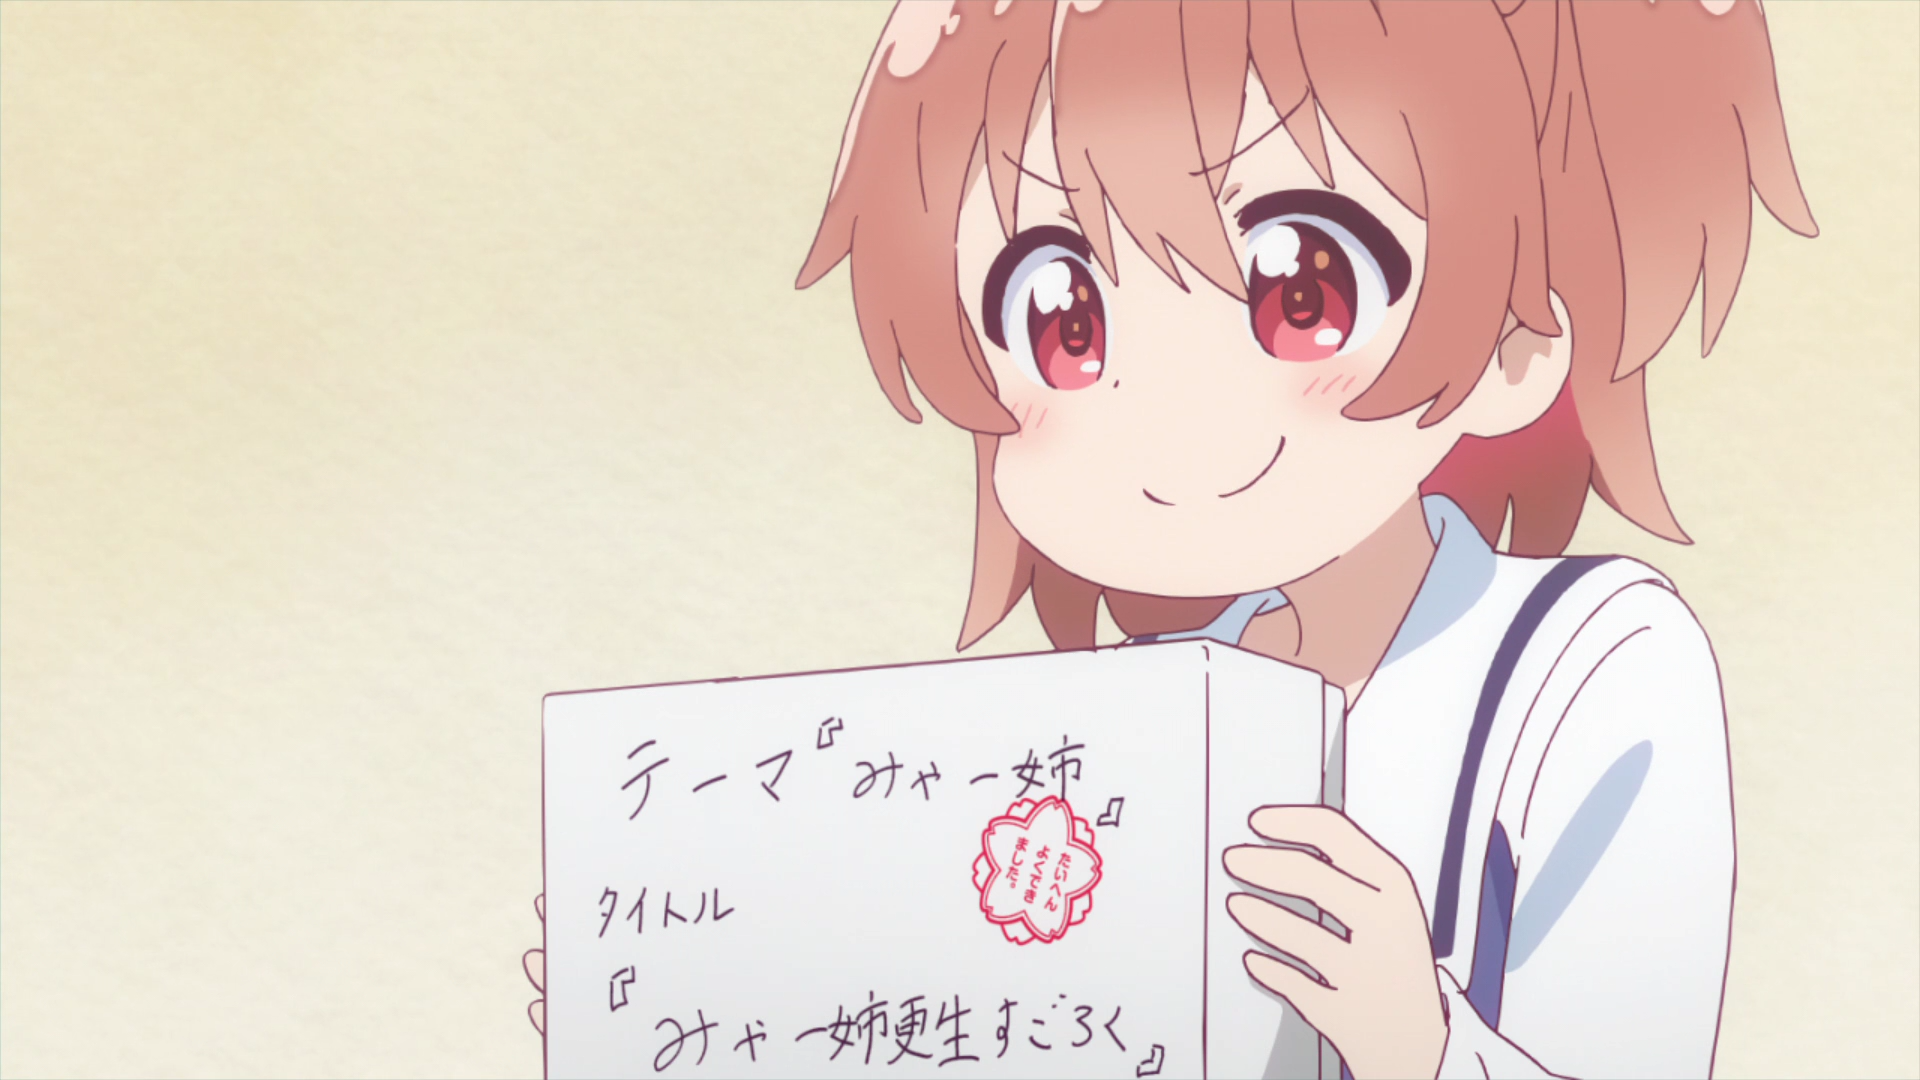 On first glance this looks like a subtle gradient with the top of the box being a somewhat lighter shade than the bottom. Since there are very few possible RGB24 color points in this gradients, making banding introduced by
 \clips extra obvious. Let’s see if we can avoid that in AI.
Creating the gradient
First we’ll have to create and match the gradient using AI’s built-in tools. If you already know your way around AI, you can safely skip this section.
-
Create a new document, place the image as the bottom layer and lock it.
-
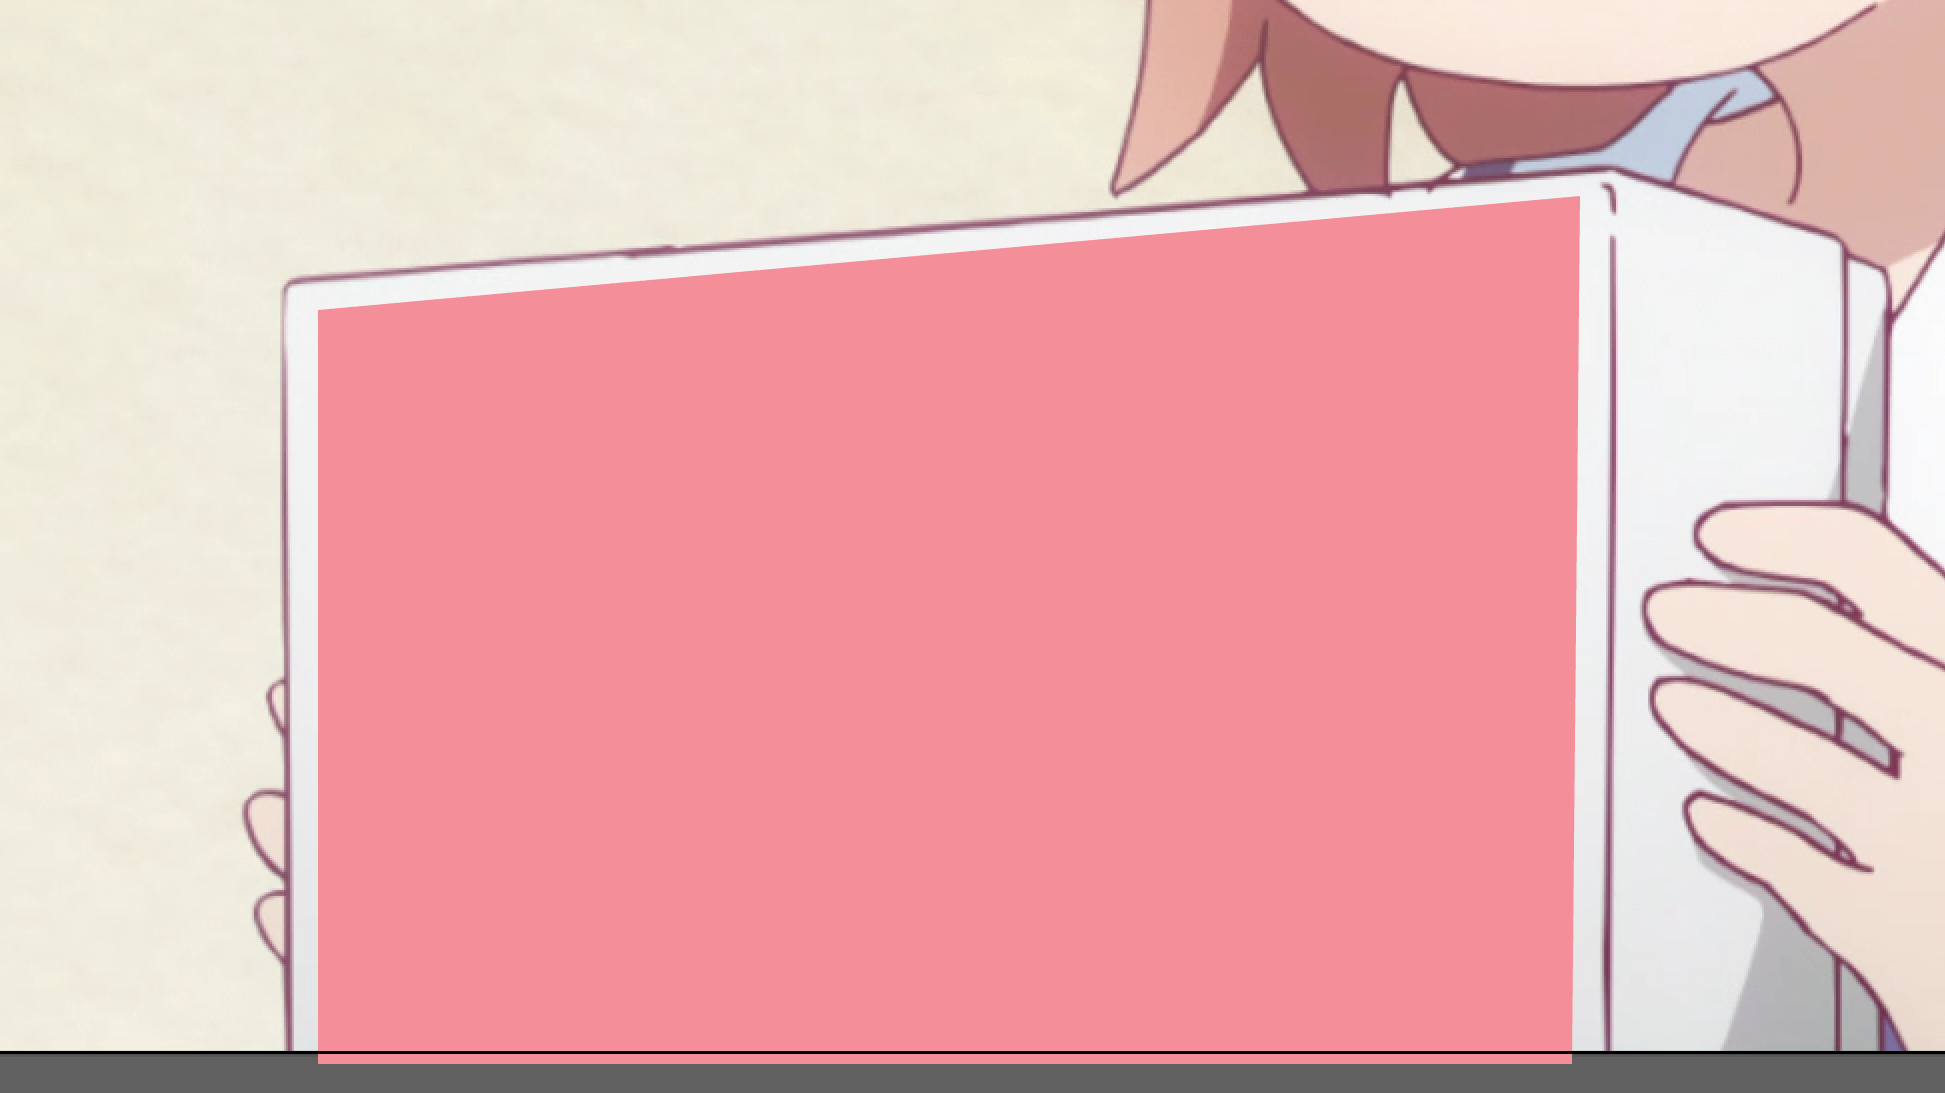
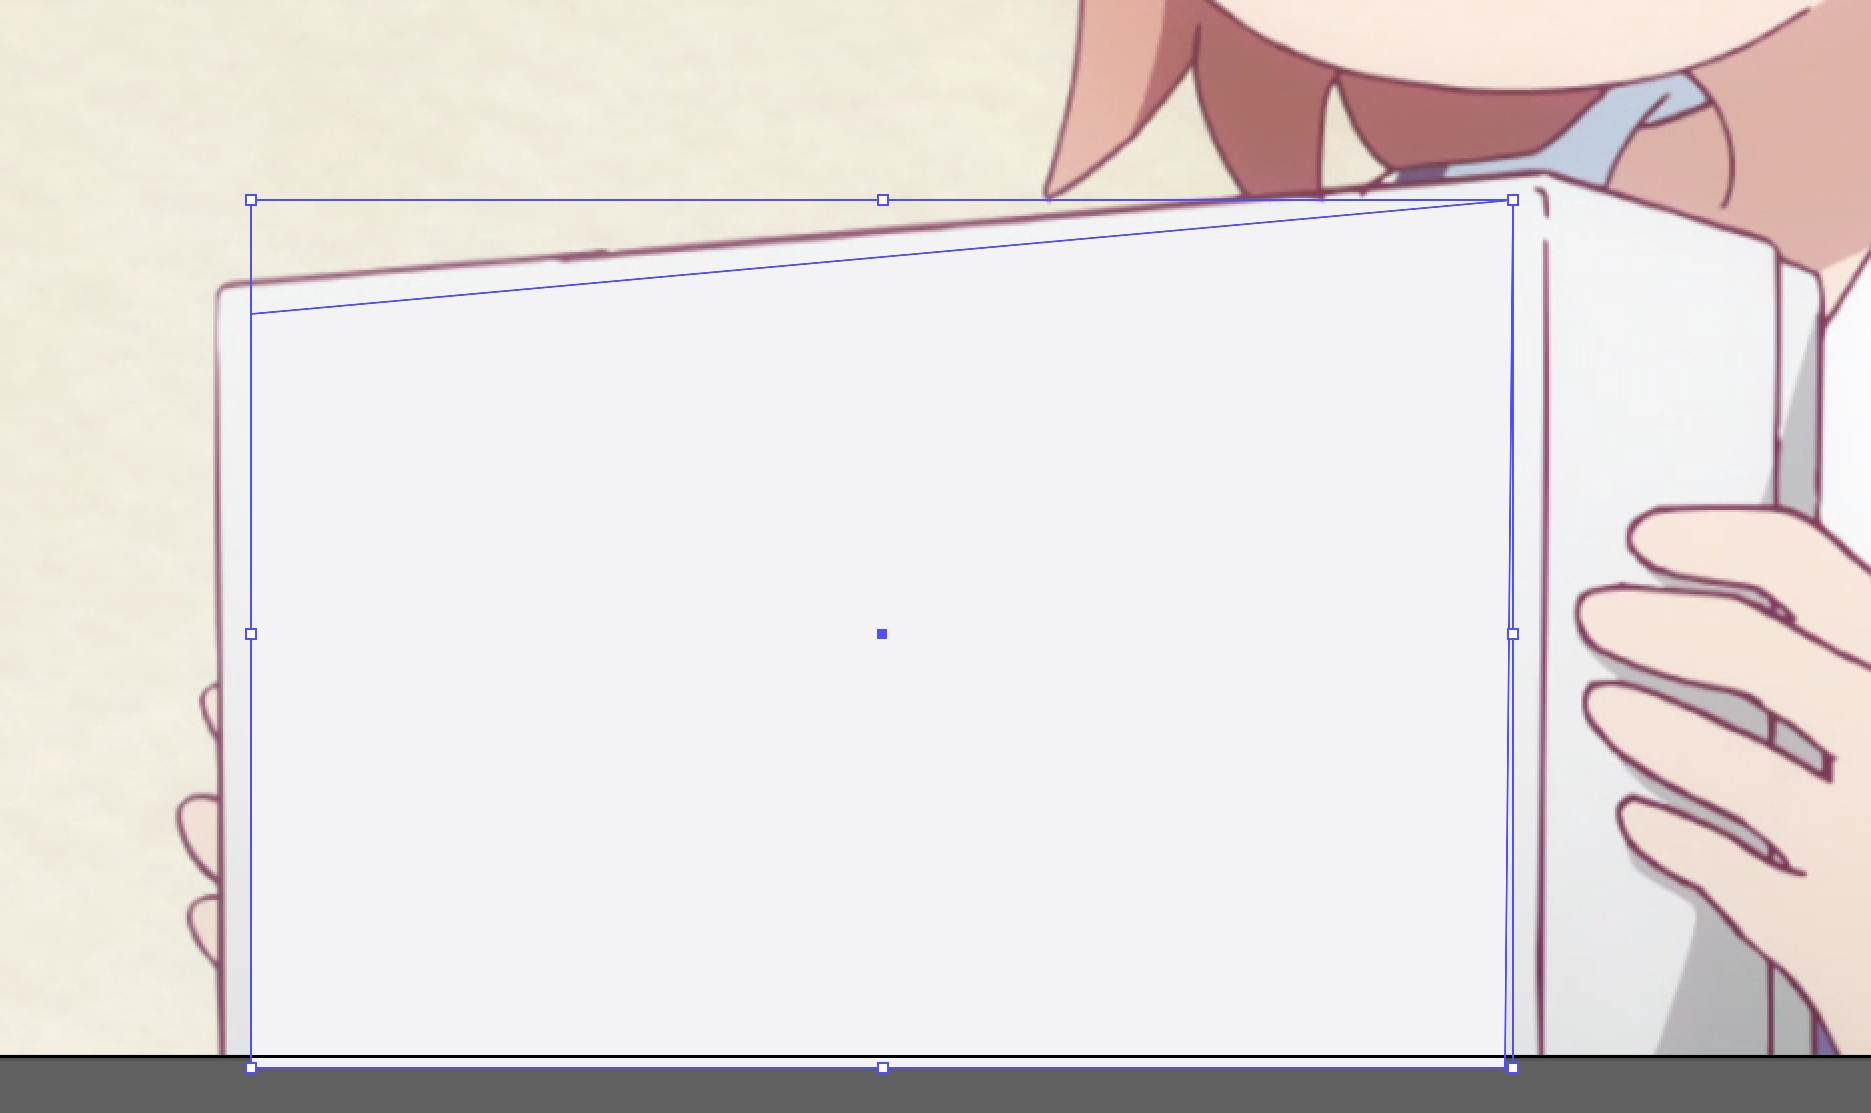
Create a new layer and draw a rectangular shape on the front of the box, covering up all the japanese text. Don’t fit it too tightly, yet, lest it would occlude our view on the original.
-
Use the color picker tool on the sides of the box you left uncovered to fill our shape. Play around a bit to figure out the direction of the gradient.
 Our initial assertion of it being roughly a top-to-bottom gradient holds, but the left side is also slightly darker than the right, making this not quite a perfectly linear gradient. Not to worry though — our job is to make this look good, not necessarily identical to the source. Once we’re done here, our gradient will cover the whole front of the box and nobody will ever know what’s beneath.
 -
Open the gradient panel and use the gradient tool to start filling in your gradient. Decide on a gradient direction and rotate the gradient widget accordingly.
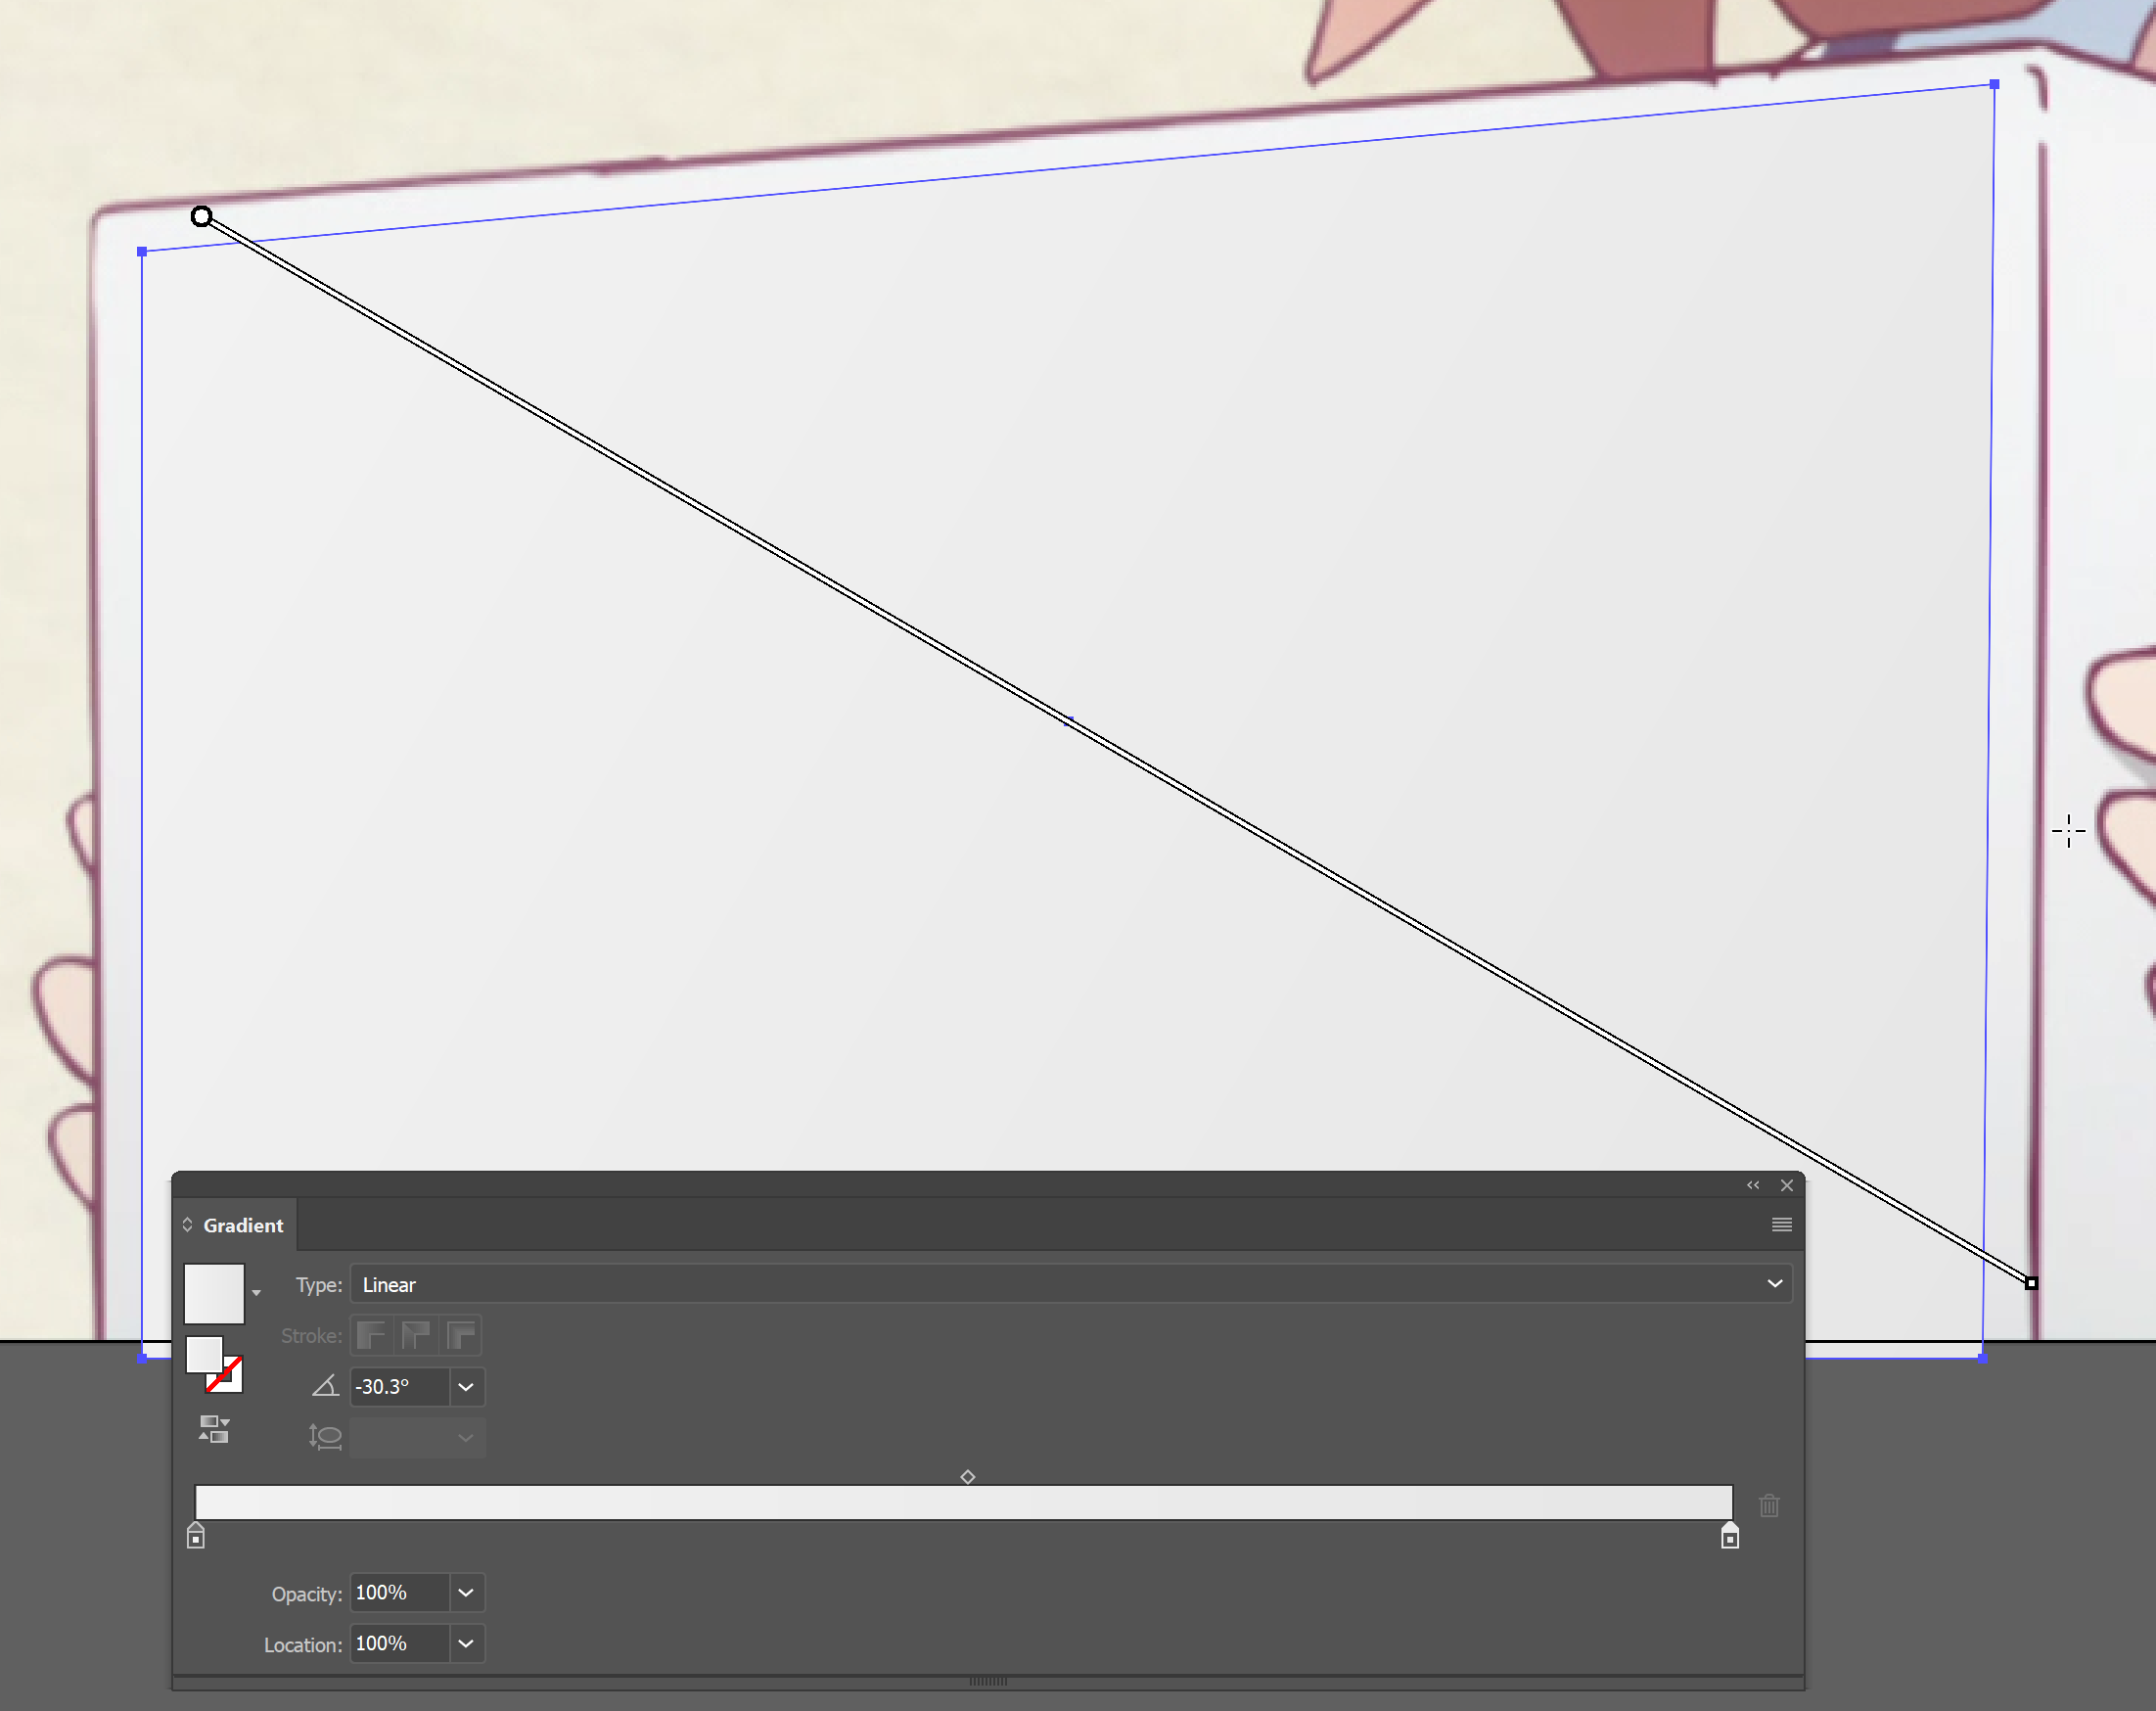
-
Use the gradient panel to add only as many color stops as is necessary to match the source to a reasonable degree. To pick a color for a particular stop, click the stop to select it, then hit the I key to select the color picker and Shift-Click the color you want to pick. This only works in the gradient panel, not on the widget. If you get disoriented with regard to the position of a particular stop in your actual drawing, temporarily pick a high-contrast color to get a clear view.
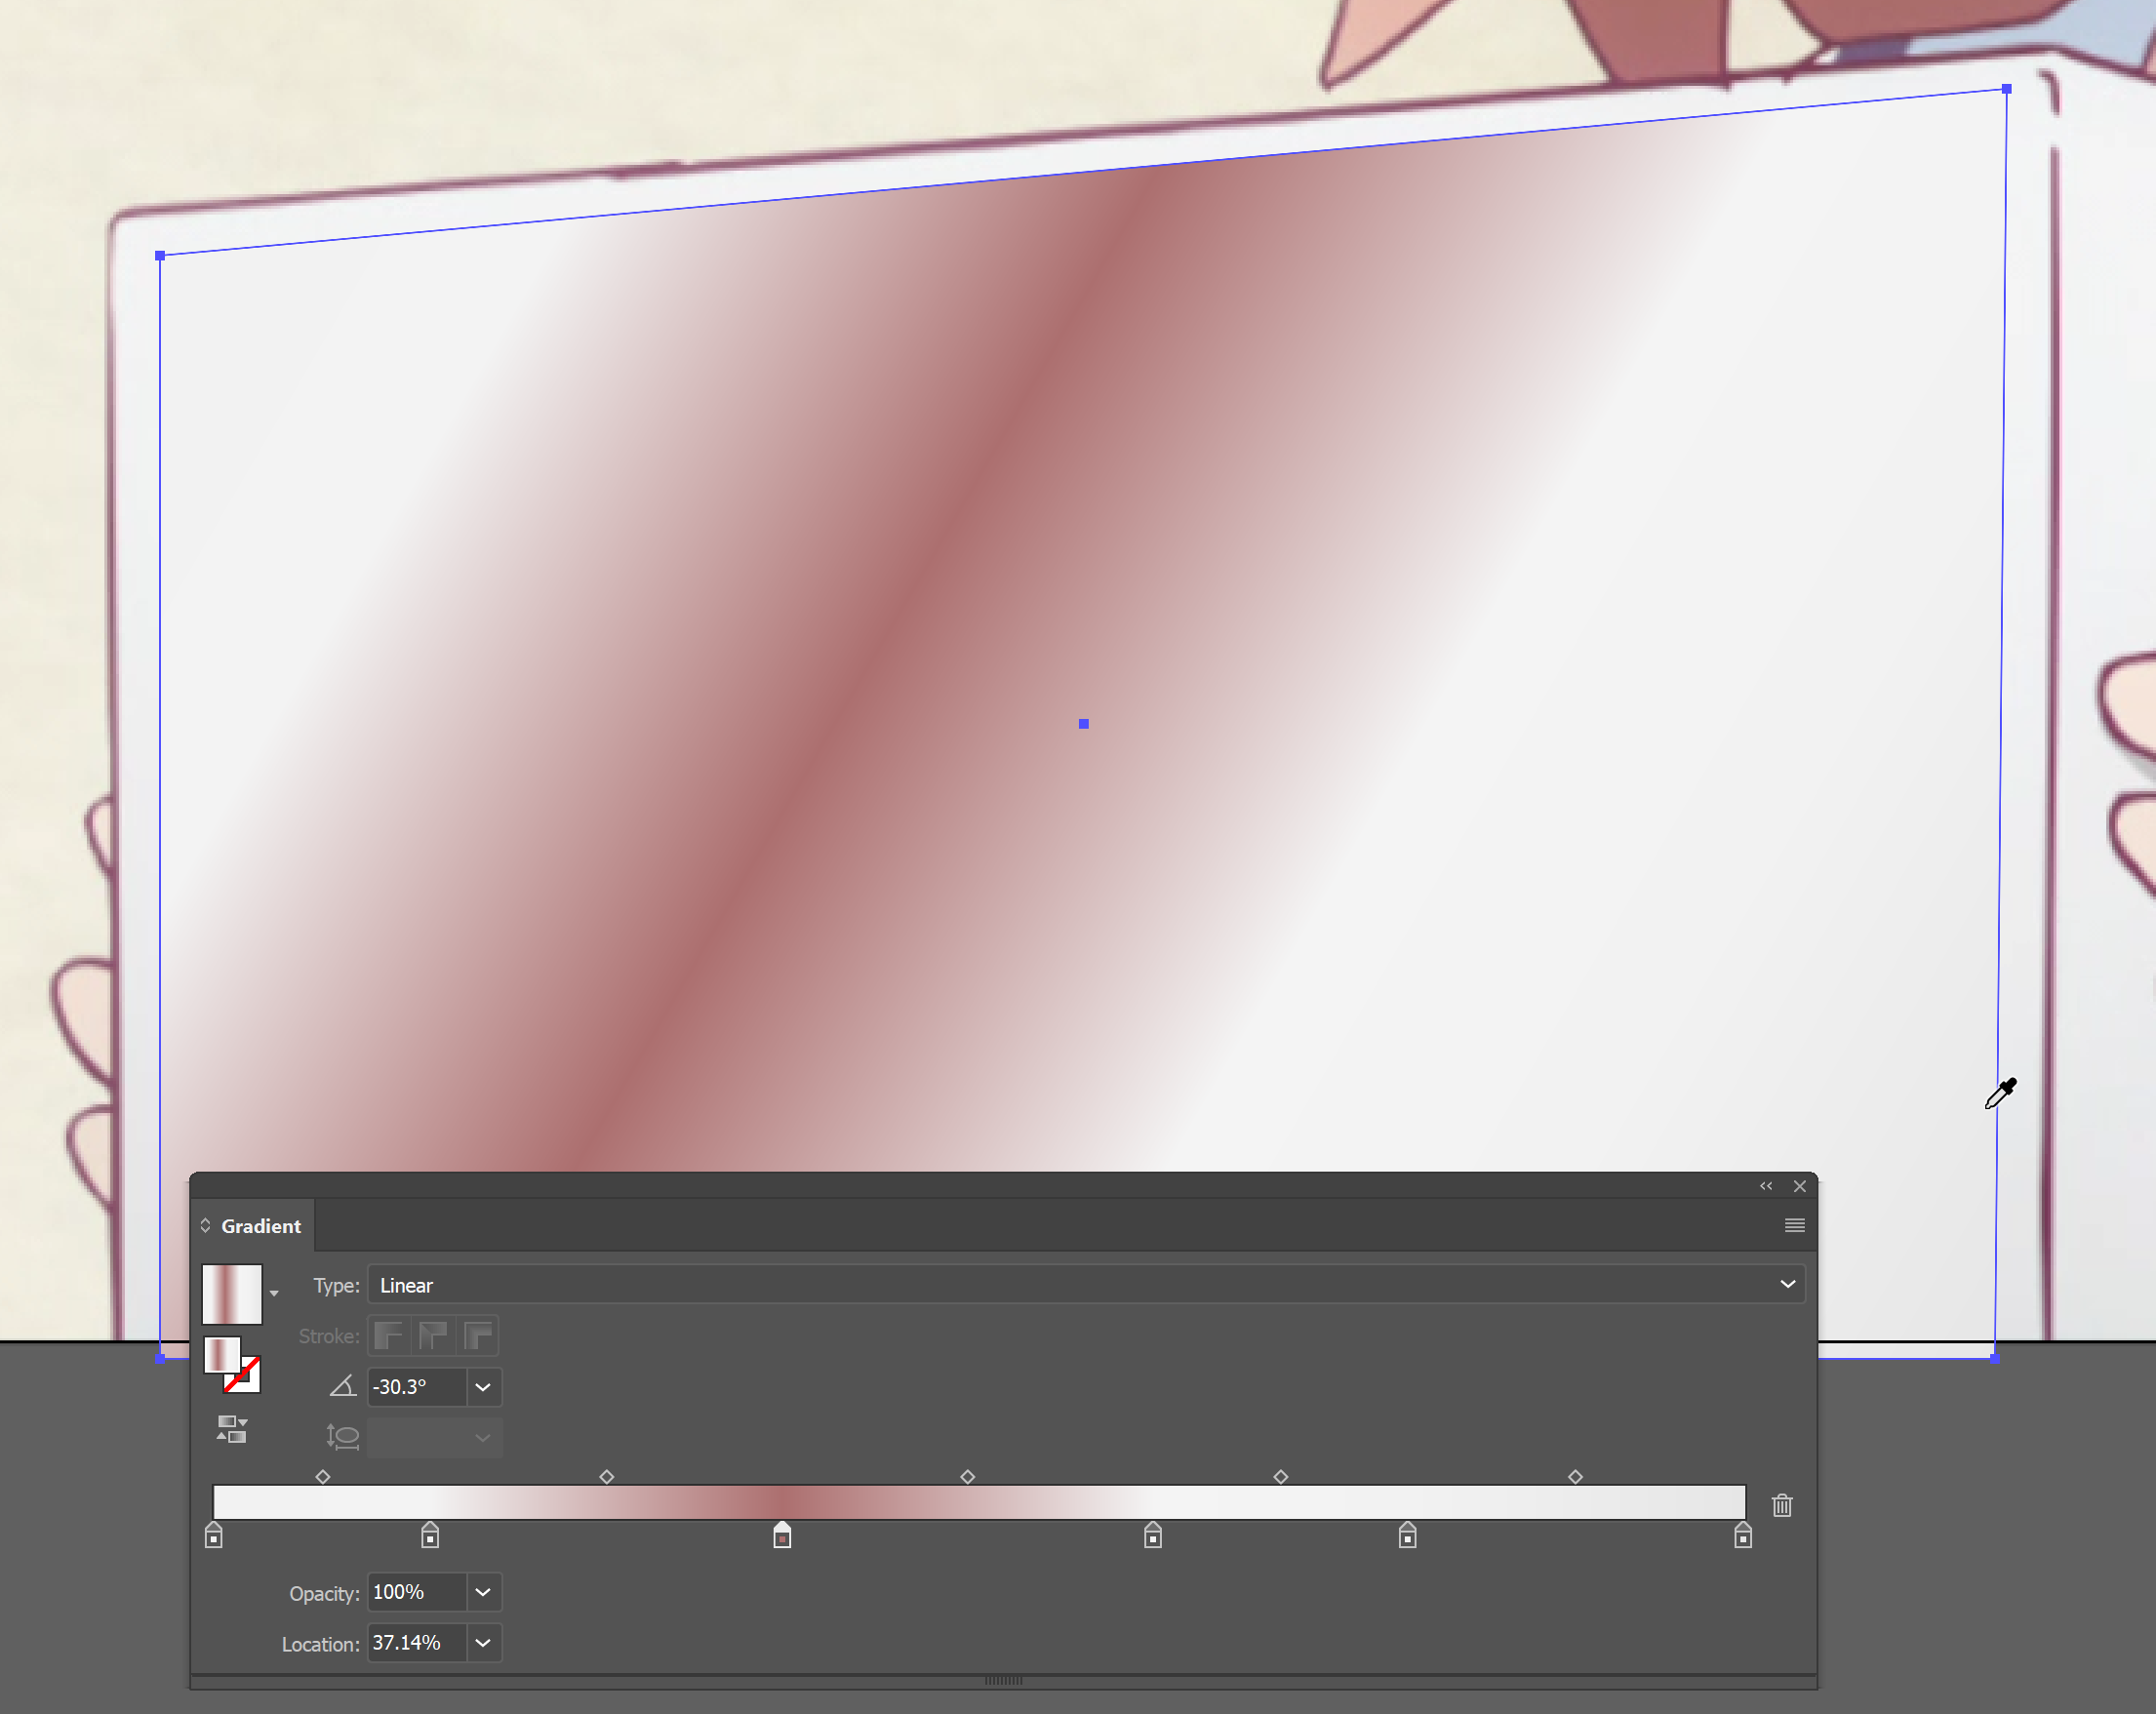
-
Once you’re happy with the results, extend the shape to cover the whole front surface of the box. Do not encroach too tightly on the line art. We will be adding blur on the aegisub side later and don’t want it affected by it.
-
Save your file in order to avoid sadness, should the scripts we’ll be using to convert the gradient to ASS crash AI.
Exporting the gradient into Aegisub
Gradients are a type of shape fill we can’t directly export with AI2ASS. Partly because the latter lacks the functionality, but more importably because ASS does not natively support gradients. The steps we will take here is to expand the gradient into a number of differently coloured strips — not unlike we’d do in Aegisub, but using a method that does not generate \clips in the ASS output.
-
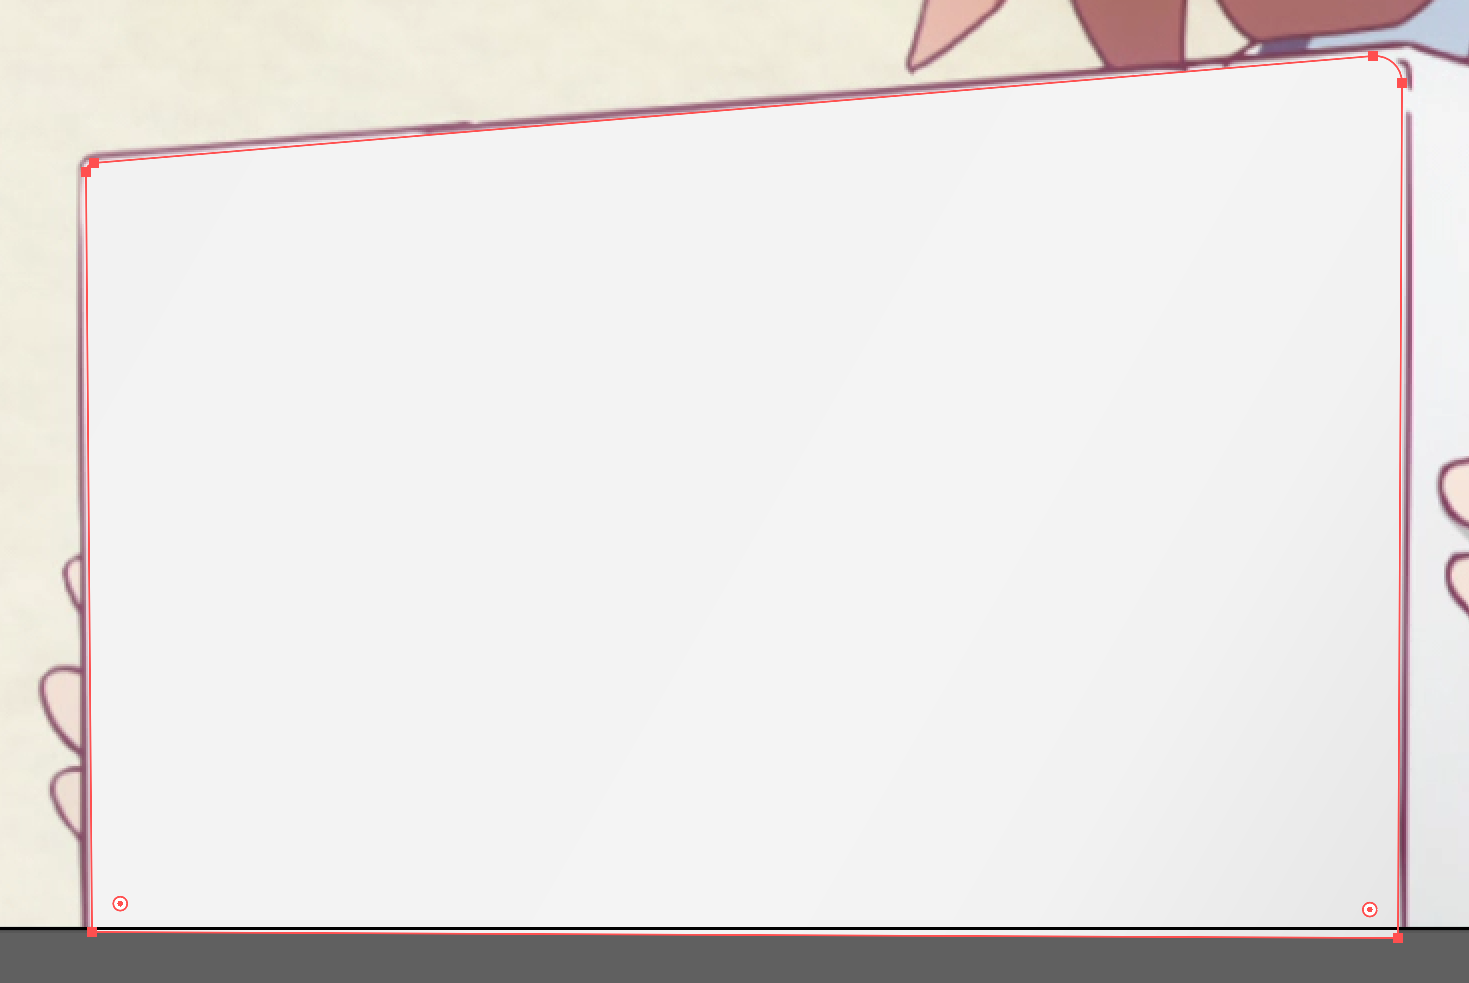
Create a new layer and copy your finished shape with gradient fill into it. A copy is required because the following actions are non-reversible. If you need to adjust the gradient later, you will need to go back to the original and repeat the whole export process again. Hide and lock the original layer.
-
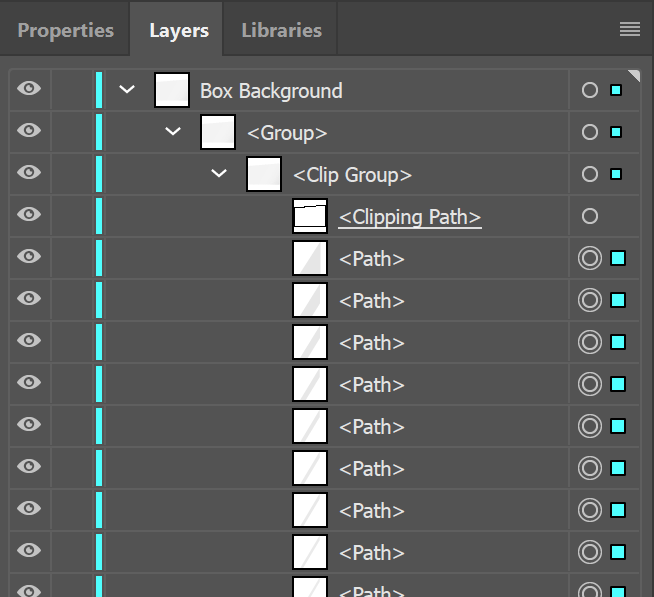
Select the working copy and expand the gradient using the Object > Expand menu. Make sure you only expand to fills using separate objects. Gradien meshes cannot be exported with AI2ASS.
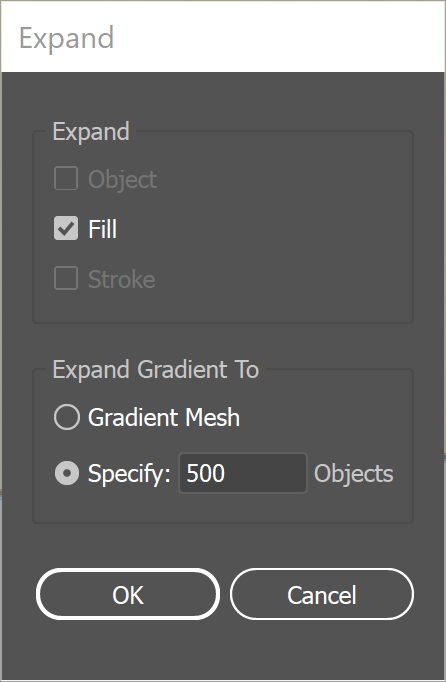 The object count determines the maximum number of gradient strips to be generated across your whole drawing. The actual number is often well below that, since the size of a strip is variable and depends on the amount of actual local color variation. On that account there’s no good default, but as a rule of thumb you want to start low, undo and increase the number until the banding almost starts to disappear. Larger drawings also need more strips for smooth gradients. In this case i settled with 400, which gave me this result:
-
Since we plan on applying
\blurin Aegisub later, we need to extend each one of the gradient strips a in order for them to slightly overlap with each other. If we didn’t, the background or whatever is below the sign would shimmer through. As a consequence the amount of overlap required depends on the amount of\blurwe’ll be adding. Large amounts of\blurhelp with banding, but large overlaps hurt the gradient fidelity. Run myExtend Pathsscript via the File > Scripts menu.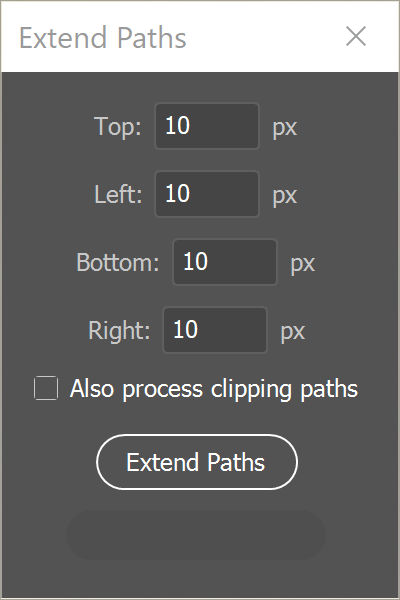
-
Fill in numbers for the all four of the extension dimensions. Between them the amount should vary according to the angle of your gradient. Vertical gradients use top=bottom and 0 for the rest. Horizontal gradients use left=right and 0 for the rest. 45-degree gradients use the same values for all of them. Do not check the also expand clipping paths option as that would change the dimensions of your drawing.
 This is what i got with values 15,10,15,10. Now this is a fairly low overlap, but i’ll show you how we’re going to get away with it in cases like this.
 -
(Optional) Run the Apply Clips script to intersect all gradient strips with the clipping path AI created from your original drawing shape when expanding the gradient.
 This will do away with the clipping path so AI2ASS can export lines without
 \clips. This step is technically not required and AI2ASS can export clipping paths just fine, however we would not be able to blur the outlines of our gradiented box front in Aegisub later.
 -
Export with AI2ASS and import with Paste AI Lines in Aegisub. See Part 1 of the tutorial for details on that process.
-
Progressively apply increasing amounts of
\blurto all imported lines using Nudge until you see streaks appear where the background starts shimmering through.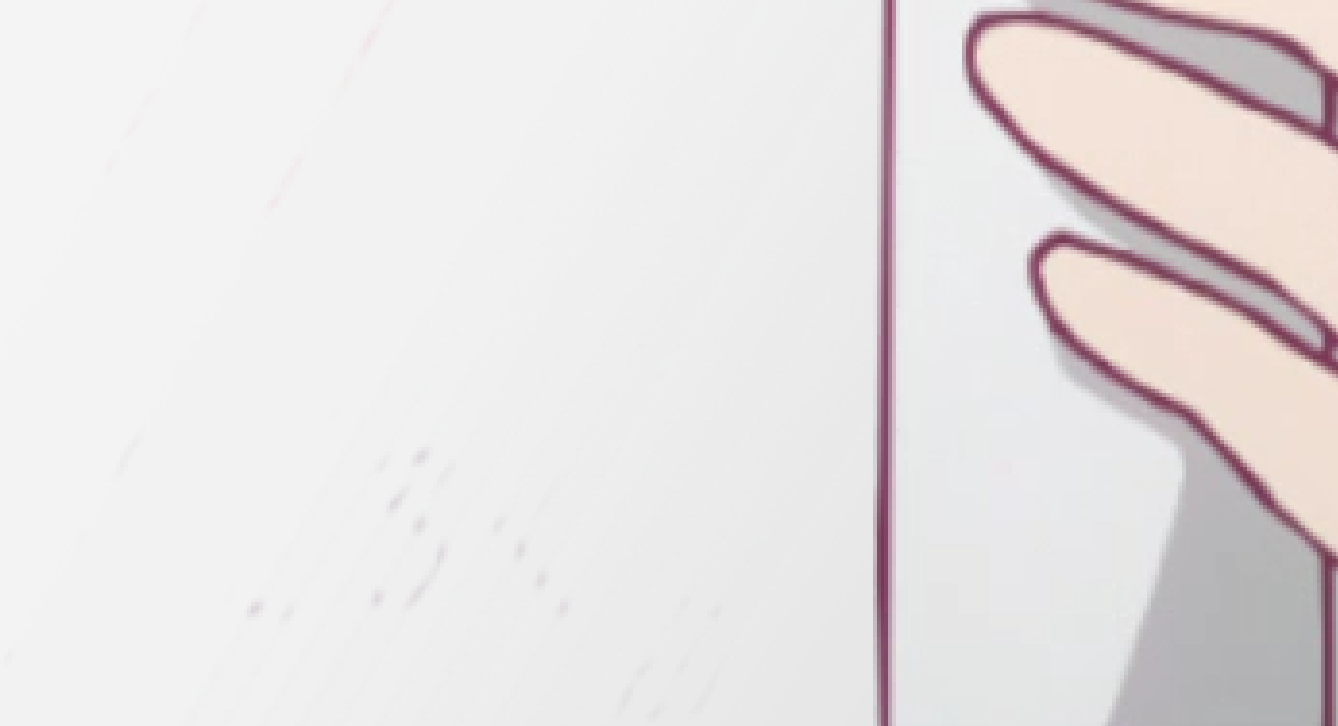 Reduce
 \bluruntil the streaks disappear. Now you’ll notice that owing to our low overlap and the high text-to-background contrast the streaks will be there even at fairly low values. -
(optional) Since the gradient is so subtle, we can cheat a little, by putting a copy of our initial drawing beneath all of our gradient layers and give it the fill
\color of a midpoint gradient stop. This will mask the high-contrast text and make things blend a lot smoother.
Final Result