Inner Shadows and Script Updates
It’s been a while since my last blog post and writing another huge one has proven to be a daunting task, so I decided to switch gears and go for shorter yet more frequent updates instead.
Creating an Inner Shadow
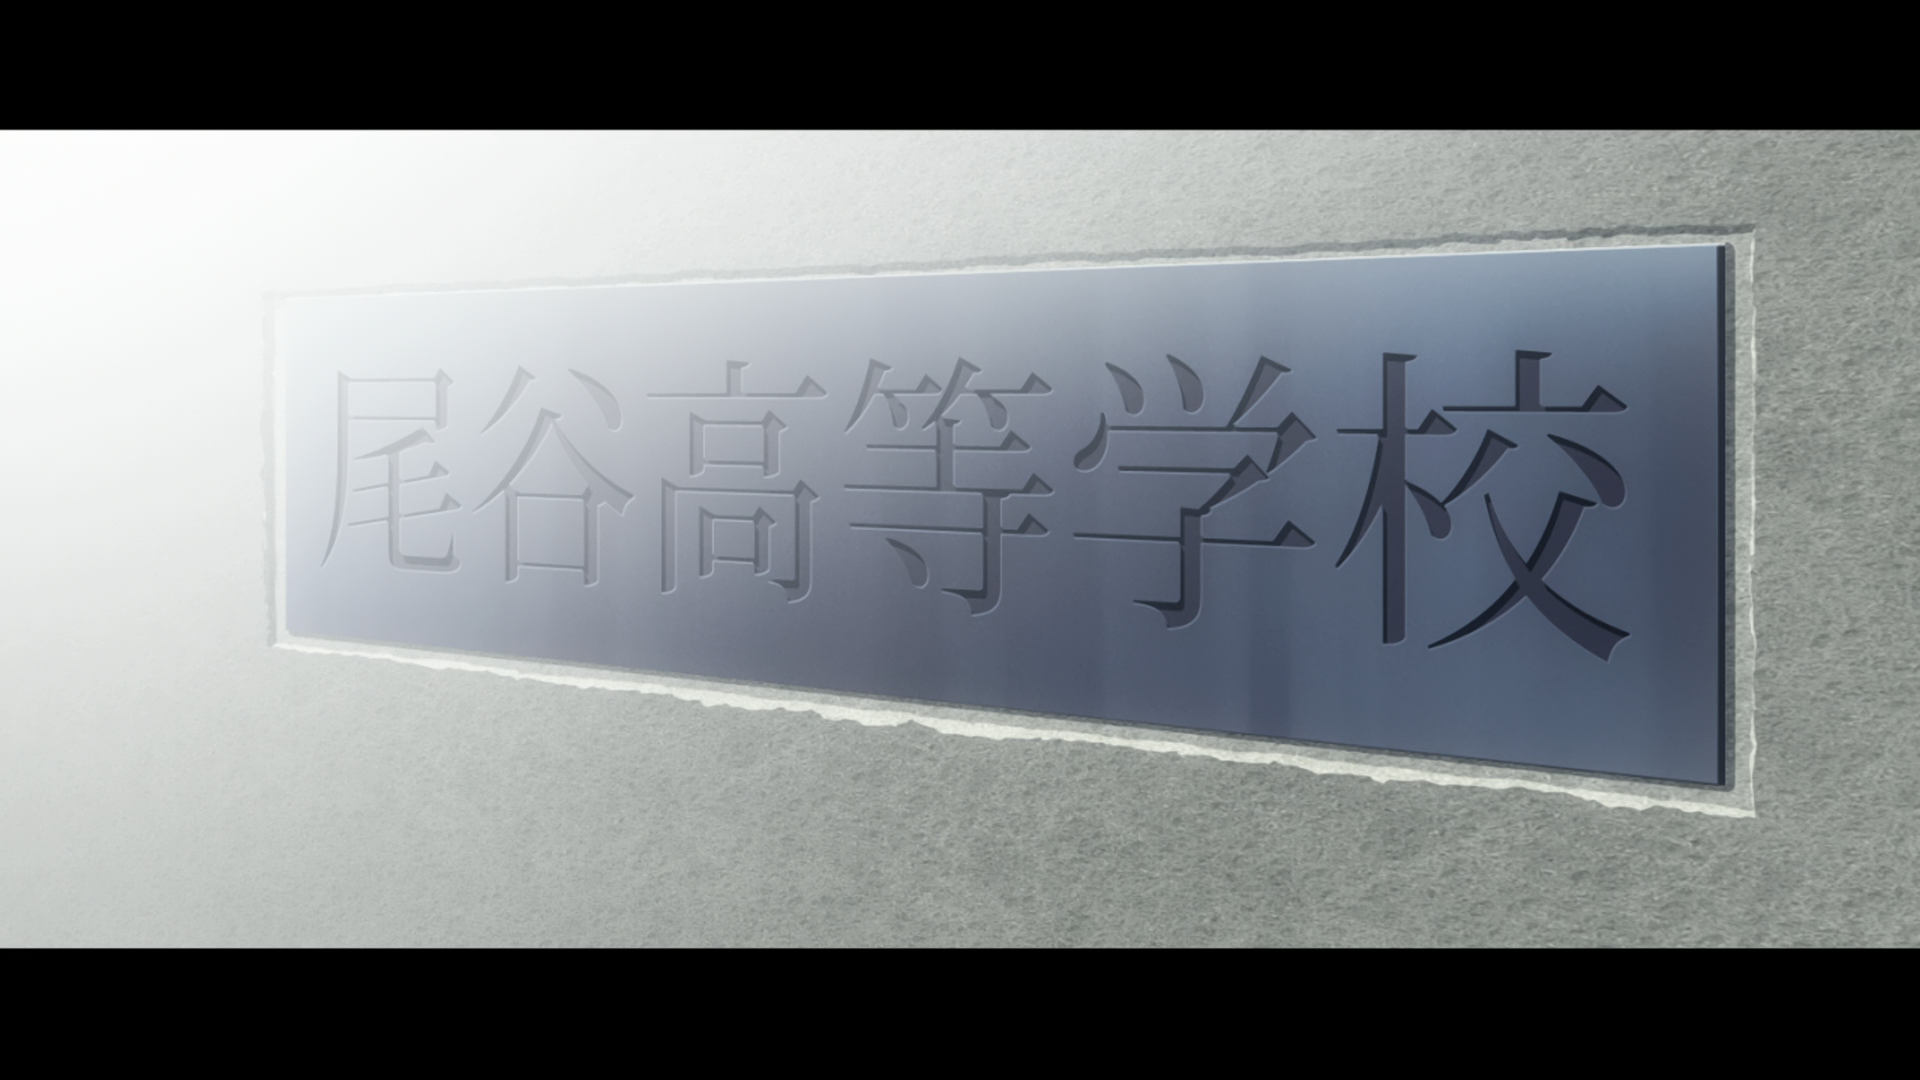
Today we are going typeset a sign that requires us to add an inner shadow, which is an issue when you have to do it using only Aegisub but takes only a few steps when be done in Illustrator. This tutorial assumes you have a recent version of Aegisub, Illustrator and AI2ASS installed and you’re familiar with using these tools (If you’re not, read here first). Let’s cut to the chase…
- … and load our sign into AI:

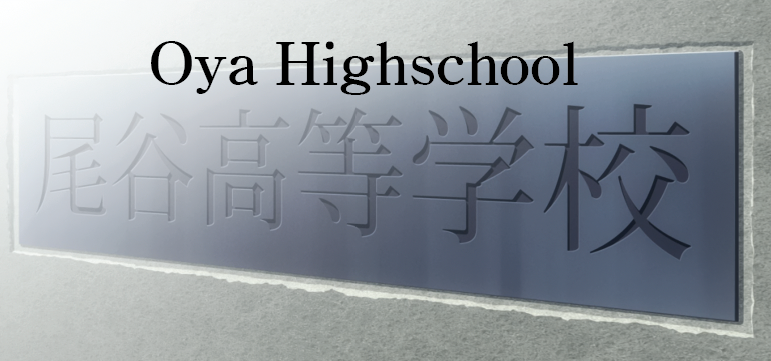
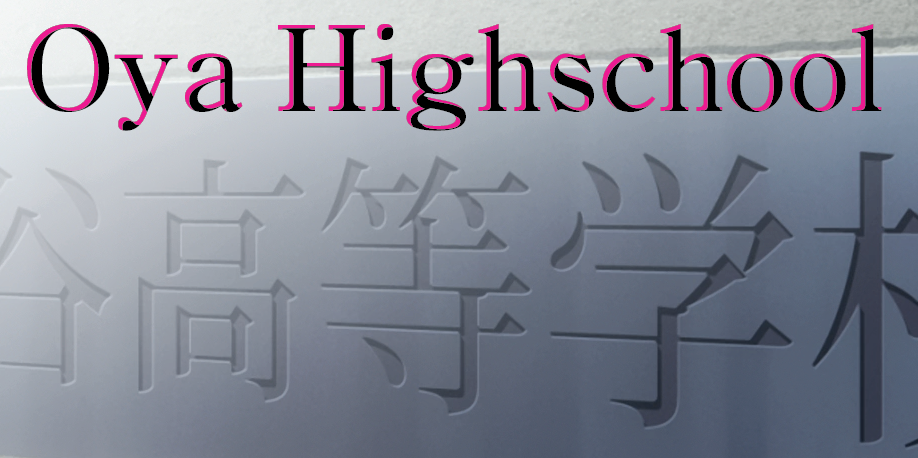
- Pick an appropriate font (I chose Iwata Mincho Bold) and add a new text layer with the sign translation “Oya Highschool”. Place it somewhere above the original size, but don’t concern yourself with the rotation or gradient - we are going to apply these in Aegisub.

- Expand the the text to outlines and create a duplicate we are going to use as the inner shadow. Lock and hide the original fill layer.
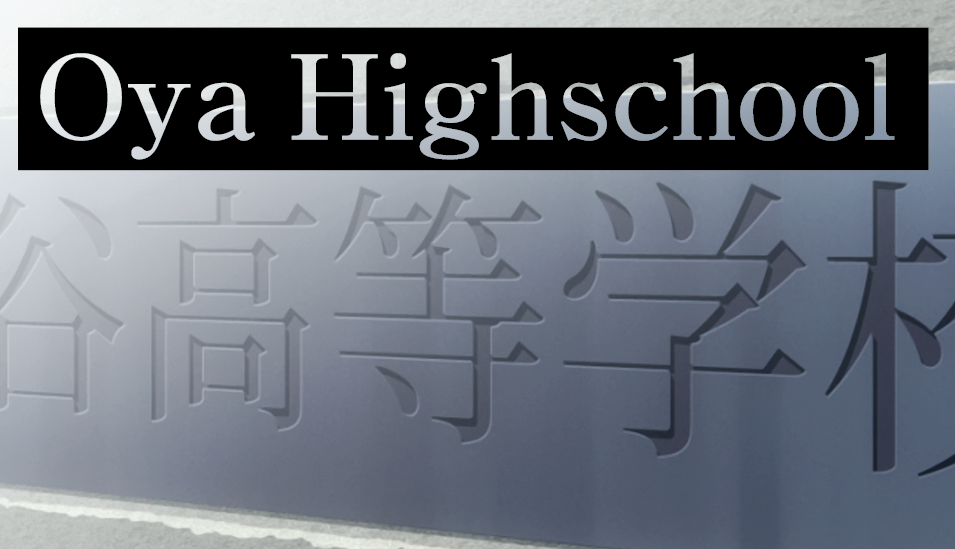
- Draw a filled rectangle over the text, select both (or everything if all other layers are locked) and use the
 Exclude Pathfinder to create a cutout shape. Turn the whole shape into a Compound Path.
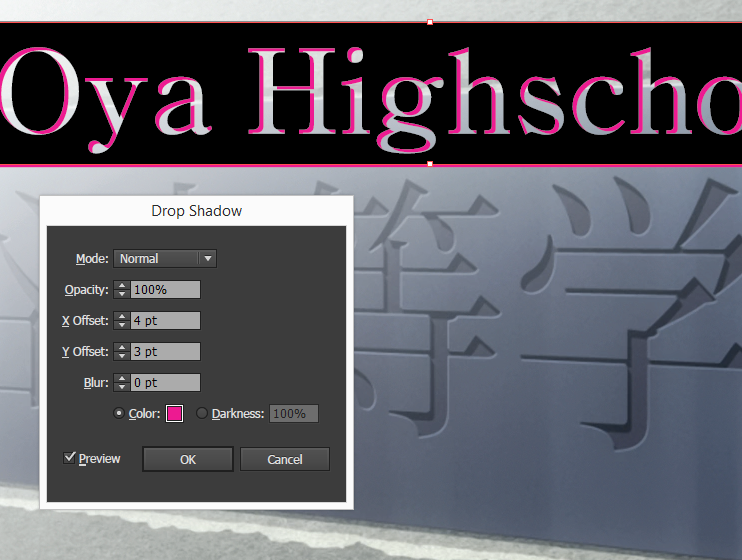
- Add the Effect > Stylize > Drop Shadow_ Layer Style. In the Drop Shadow Dialog set Opacity to 100%, Blur to 0pt and pick a color that allows you to judge the amount of X and Y Offset required to match the original sign.

- When you’re done, click Object > Expand Appearance and use the
 Minus Front Pathfinder to get only the inner shadow outlines. Delete the drop shadow of the rectangle, re-enable the fill layer and check your result.
- For the bright highlight you have 2 options:
A. Create another copy of the fill layer, add a drop shadow, expand the result and use the
 Unite Pathfinder to get a composite shape we can use as the bottom layer in our ASS script.
B. Create a duplicate of the fill layer with a position offset in Aegisub and use that as the bottom layer.
Unite Pathfinder to get a composite shape we can use as the bottom layer in our ASS script.
B. Create a duplicate of the fill layer with a position offset in Aegisub and use that as the bottom layer. - Export your sign using AI2ASS and apply gradients and rotation in Aegisub. Done.


Automation Script News
Perhaps this is a good time to plug one of my new scripts and a few improvements in other scripts you shouldn’t miss out on. First of all, lyger’s Gradient Everything got an update that makes use of ASSInspector to determine the bounding box for the gradient strips, so you no longer have to draw a clip manually. I also added a new AI2ASS export mode that creates full ASS dialogue lines which contain, among other values, the numbers and names of your Illustrator layers. Paste AI Lines is a companion macro for convenient pasting of AI2ASS exported lines into Aegisub. Features include:
- Trim Drawings: makes drawings start at the top left point of their bounding box instead of at the script coordinate origin. This makes the dragging point appear next to the drawings (or inside depending on the chosen alignment) instead of at the top left on the the preview window, which in turn allows for easier dragging and rotation without having set an origin.
- Layer Offset: provides a few ways of adjusting the AI layer numbers to your ASS script.
- Auto Mode: the layer number of each imported lines is offset in a way that makes them appear above all the currently selected lines, but without any number gap between the highest selected layer and lowest imported layer. This is the Default and should fit quite well into common workflows.
- Unique Mode: the layer number is incremented for every imported line starting at [highest selected layer + 1]. Use this mode if the stacking order of object inside your AI layers matters.
- Offset Mode: takes the layer numbers from your AI document and adds the configurable value. The offset value can also be used as an additional offset for the other 2 modes.
- Copy Times: copies the cumulative start and end times of the selected lines.
- Set Style: the style name of AI2ASS lines is hardcoded to ‘AI’. If you want to use a different style, enter it here.
- Remove Actor: use this if you don’t want the layer name appear in the actor field.
The script requires a bunch of modules: Aegisub-Motion (which also got an update), ASSFoundation and by extension ASSInspector. Another macro that may prove useful to many of you is my script cleaner ASSWipe (trying to follow in torque’s footsteps wrt terrible ASS puns here). It removes duplicate, redundant or otherwise ineffective override tags and junk from your lines, filters useless clips, deletes invisible lines and combines identical lines so long as they are consecutive in time (e.g. created by line2fbf script). It shares all of its requirements with Paste AI Lines__, and to avoid confusion I’m currently distributing test snapshots that contain up-to-date versions of all required modules. I’m always open for questions, suggestions and bug reports concerning my tools and tutorials. You may use the comment section, but as this blog has very few readers i tend to only check it sporadically, so I’d suggest you contact me via IRC or create a Github issue if you want a swift reply. For general typesetting questions not covered in the available guides, I invite you (yes, all 3 of you!) to join #irrational-typesetting-wizardry on Rizon, where you can meet pretty much all of the relevant TSers in (English speaking) fansubbing .